Search
RSS

Blog

Top 5 Hardy Flowers

There are many beautiful hardy  flowers for the garden! If you are looking for a beautiful flower garden that does not require a lot of time then take a minute to check out my top 5 picks.

 #1 Delosperma cooperi "Hardy Ice Plant" Light purple flower that blooms all summer. Spreads as much as 3-4 feet. The purple flower turns dark as our temps. drop. Great for ground cover.

#2 Gaillardia 'Kobold' "Blanket Flowers. These flowers produce bright shades of red and yellow. They bloom all summer long and into the fall. They require full sun and well-drained soil. The Blanket Flower reaches about 3 feet tall.

#3 Perovskia atriplicifolia "Russian Sage". This flower offers a silvery foliage with a beautiful purple bloom. This flower has a beautiful fragrant smell. It loves full sun and well drained soil. Another plus is that most pest don't like to eat it. The Russian Sage reaches 6 feet tall.

#4 Salvia "Meadow Sage" This flower has a deep violet or blue flower. It blooms from midsummer to early fall. The hummingbirds love this flower. This flower tikes full sun and a well-drained soil. The Meadow Sage grows up to 28 inches tall.

#5 Oenothera macrocarpa "Sundrop". This is a beautiful yellow blooming flower that blooms in the spring time and goes to early fall. This flower is very strong and can take the heat! It tends to take over the garden at times. The Sundrop needs full sun and well-drained soil. It grows up to 6 inches tall.


Cake Pan Stepping Stone

 Don't settle for the same old stepping stones you find at your local hardware store.

Make it your own by adding your personal touch. Is all you need is a  cake pan, contact paper, ready mix concrete, rubber gloves, Vaseline, chicken wire, sponge, bucket, varnish and your personal selection of marbles, glass, rocks and anything else you might like to add. You can also make new pieces by breaking up old china or glass.

Be sure to use protective gloves and eye ware before you start hammering.   Now you will need to rub the inside of your cake pan down with Vaseline to prevent the cement from sticking.

Next you cut out the contact paper into the shape and size of your cake pan. Place the contact paper in the bottom of the cake pan with the sticky side up. Place your rocks, glass and marbles onto the contact paper face down creating your own personal design. Now you are ready to mix your concrete. find an old bucket and pour enough concrete into the bucket to fill your cake pan.

Next you need to slowly add water and stir the concrete with a long spoon until it is the consistency of cake batter.

Do not get the concrete on your skin. If it does get on your skin wash it off right away. If you leave it on your skin it will start to burn. Fill the cement to the top of the cake pan. Now place a square or circle piece of chicken wire into the cement and press it about half way down.

Don't cut the wire too big or it will be sticking out the sides of your stepping stone.


Allow the cement to harden then you are ready to remove your personal stepping stone.

You can use a sponge to clean your stone and use the extra cement to fill in any air bubbles. Finally you can varnish your stone to keep it nice and shiny.

Garden Signs


Are you looking for a way to spice up your garden this summer? What about creating your own personal sign. It can be very simple and does not have to cost a lot. I found almost everything I needed in my barn.

If you have some old 2x4s, paint, nails and a hammer you are set. Now depending on what you decide to paint you may want some letter stencilers or a nicer tint of paint than what you have in the barn.

If you need some ideas check out a garden magazine find something you like and put your personal touch on it. Maybe you can stenciled your last name on one of the 2x4s and then add a flower or two.

The options are endless. If you don't like how it turns out let that paint dry and try something new later. 


Protect Your Seedlings


It's the time of year where you work so hard to getting your garden planted. The rewards are great as long as you can protect your plants from the last frost, and pests!


The scare crow is a good idea in some cases for example keeping the curious three year old out, but it does not always work.


I came across a cheap DIY idea that may help some of you protect your seedlings. It might not work for all of us, but it is very inexpensive! It may be worth giving it a try. 


Just cut off the bottom of your jug/plastic container and place it over your seedling. The jug will protect your smaller plants from frost, birds and other small creatures.


Protecting you seedlings now will be very rewarding in the near future.

Growing Organic Tomatoes


Grow Tomatoes Organically
 
1. You will need a place with at least 5 hours of sun.
 
2. Work up the soil and add compost or rotten manure.
 
3. Tomatoes love to eat! Add about ½ dozen egg shells to the soil as well (this adds calcium to help prevent rot)
 
4. You can buy or grow you tomato plants. When picking your plants don’t buy a big plant that is growing in a small container. Also avoid tall tomato plants. These plants tend to be root bound.
 
5. Tomatoes don’t like frost! Wait till the frost season is over.
 
6. To plant tomatoes dig a deep hole or long trench. Loosen roots as you remove the seedling from the pot.
 
7. Plant the tomato plant deep. You want about 3-4 inches of the plant above ground.
 
8. You will want to put up a trellis to support the tomato plants. As the plant grows you can tie it to the trellis with a soft cloth.
 
9. If you don’t want to bother with a trellis you can let them spread out on the ground. Just be sure to give them lots of room so they don’t rot.
 
10. Tomatoes need water! They need about an inch or water a week. Don’t give them too much water because this can cause rot. If you are looking for a great way to water your tomatoes check out Mister Landscapers DIY low-flow Drip irrigation kits. They work great when you want to save water and give your plants the perfect amount. Check them out at www.misterlandscaper.com
 
11. Don’t let the weeds tale over
 
12. Enjoy your home grown tomatoes!


Easter Eggs Garden Style

This is the time of year where people like to get creative with coloring eggs. While looking for a way to incorporate my love for gardening with my love for decorating eggs I came across a really cute idea that someone posted on Pintrest from lotsofdiy.com. 


Materials:

1. boiled eggs

2. panty hose

3. bread tie

4. egg dying kit

5. small garden leaves


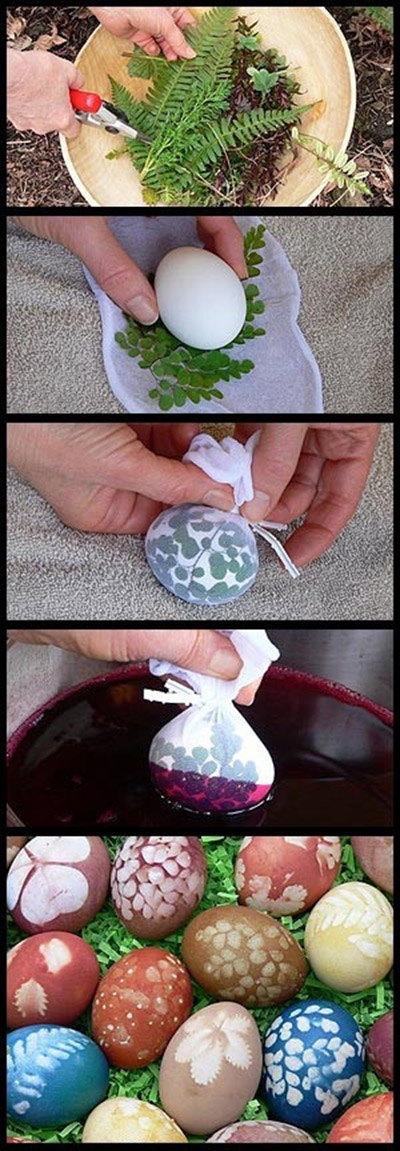
The idea is to use green leaves from your garden as a tool to dye eggs with beautiful leaf prints.

First you need to find hardy small leaves that are small enough to fit on an egg.

Next you are going to wrap the leaf around the egg and gently place the egg into the leg of an old panty hose. 

Now you are going to tie the egg snug into the hose so that the leaf will protect the white part of the egg under the pattern of the leaf from food coloring. You can tie off the panty hose with a bread tie.

Next you are ready to dip your eggs into the food coloring. Once you have the desired color pull the egg out and let dry.

Once it is dry you can remove the leaf and enjoy your garden print eggs. 

Here is another great garden egg idea from duitang.com


Save Water


Spring is in the air and soon it will be summer! This is the time of year when we get outside and turn on the water. We fill the pool, clean the house, wash the car, and water the flowers. A lot of water will be flowing come spring and summer. This means a hike in your water bill and for some a water crisis.


Mister Landscaper has worked very hard through the years to help families save water. We all love the beautiful flowers growing in our gardens and the fresh fruit, and vegetables. Mister Landscaper understands the importance of gardening.


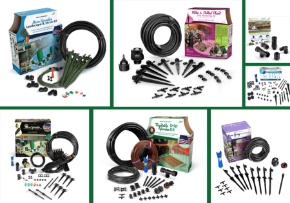
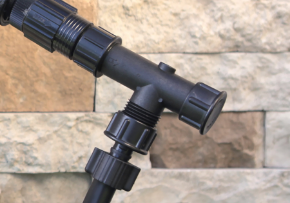
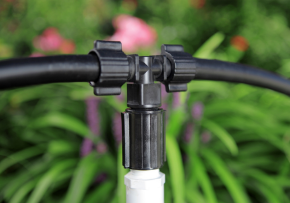
They also understand that conserving water is very important. This is why they decided to expand their low-flow irrigation system business and offer it to the public. They have developed DIY low-flow irrigation kits that are high quality and very easy to install. Everything you need comes in one kit.


If you ever decide you want to expand the low-flow irrigation system they sell the expansion parts separately as well. The family behind Mister Landscaper also strive to satisfy every customer. If you have questions we are here to help you. 

Garden Toys


We are never too old to play with Tonka trucks!

Our garden friends have done it again! They have come up with great ideas for re-purposing old toys. Don't toss out the old Tonka truck put it to good use

again by planting flowers in the back. These old toys make a great decorative conversation piece to any garden.

If you don't have a Tonka truck  use what ever you can find. The choices are endless when it comes to old toys. Check out your thrift stores and garage sales for more inspirational ideas. 

Check out our Pintrest page for more great DIY garden ideas.

Don't Lose It Use It!

It's that time of year again where you put on the garden gloves and start planting. It's so exciting sometimes you can forget what you just put in the ground.

This could leave you guessing all summer long. No worries. I have found the solution! It's an easy DIY craft that will take all the guessing out of gardening.

There are many easy ways to mark your seeds! You can keep it simple or get creative. My favorite is using old tea spoons with a picture of what you planted glued to the spoon.

The options are endless. For this one you will need


Materials Needed:

outdoor Mod Podge

Permanente markers

heave construction paper

ice tea spoons (check thrift stores or ebay)

acrylic spray coating

scissors


For this DIY craft you might want to ask the kids to help with coloring a small picture of the vegetable you are going to plant using the permanent markers. Make sure to cut out the paper the size of the spoon before you color the picture. This way you know it will fit on the spoon.

You will also want to put a small cut on one side of your circle to help it lay flat  on the spoon. Next put the outdoor Mod Podge on the back of your picture with a paint brush or Q-tip.

Then stick the picture to the inside of the spoon and press it down till you get it just right. This might take a minute.

Once the picture is in place cover the top of the picture with the outdoor Mod Podge. Give it time to dry. This will take about 20 minutes.

Next you want to seal it with the Acrylic spray. This will keep it safe from the rain and sprinklers. Now you are ready to start planting.

Remember don't lose it Use it. :)

Check Out These Other Great Ideas!

Check out our Pintrest page for more great DIY garden ideas!

Bird Cage Garden

This DIY craft will have your garden friends turning their heads for a second look. 

Be on the look out for bird cages the next time you stop at a local garage sale or flea market. With a little paint and some nice flowers you  can make an old bird cage  beautiful!

You will need:

1. bird cage

2. small chain to hand the cage

3. spray paint to paint the bird cage (you pick the color)

4. sand paper to lightly sand the bird cage prior to spray painting if needed.

5. flowers or greenery of your choice


 Once you have found a bird cage you like you will be well on your way to enjoying the beautiful new addition to your garden with just a few easy steps. First you will need to decide if you want to paint it or leave it the origional color. If  you decide to paint you will need to clean the bird cage and lightly sand it.

Next find a well ventelated area outside and spray paint the cage. Follow the directions on the can. Allow the bird cage to dry and then prepare to plant your flowers inside the cage.

You can use the tray that came with the cage as long as you place holes in the bottom as well as small rocks prior to adding your dirt and flowers. If the bottom of the cage does not have a solid bottom you can use a flower pot or another container that fits. Once you have planted your flowers you are ready to hang your new DIY garden craft.

If you are looking for an easy way to irrigate  your new birdcage garden check out www.misterlandscaper.com  for some great high quality  DIY low-flow drip irrigation solutions.